Don’t Start a Beginner with Back Squats
The back squat is an excellent strength-building exercise. However, introducing it too early in a beginner client’s training program is a common mistake among coaches. This demanding movement requires solid mobility, stability, coordination, and technique. Forcing it too soon can lead to frustration—or worse, injury.
Offering a back squat to a client in their first few weeks is like learning to drive in a race car. It’s dangerous, overwhelming, and counterproductive. A good coach knows how to scale the difficulty of exercises to foster learning, build technique, and develop confidence.
In this article, I’ll share a simple, logical, and effective progression to help your client master the back squat safely and at their own pace.
A Logical Progression for the Squat
The goal of this progression model is to develop all the essential qualities needed to perform a proper barbell back squat: stability, mobility, strength, core control, breathing technique, and muscle activation.
These qualities can be developed through a series of intermediate exercises, each targeting different aspects of the movement while gradually increasing in difficulty as your client progresses.
Here’s a recommended step-by-step sequence to take your client from beginner to advanced:
1. Box Squat (bodyweight) – 2 to 6 weeks
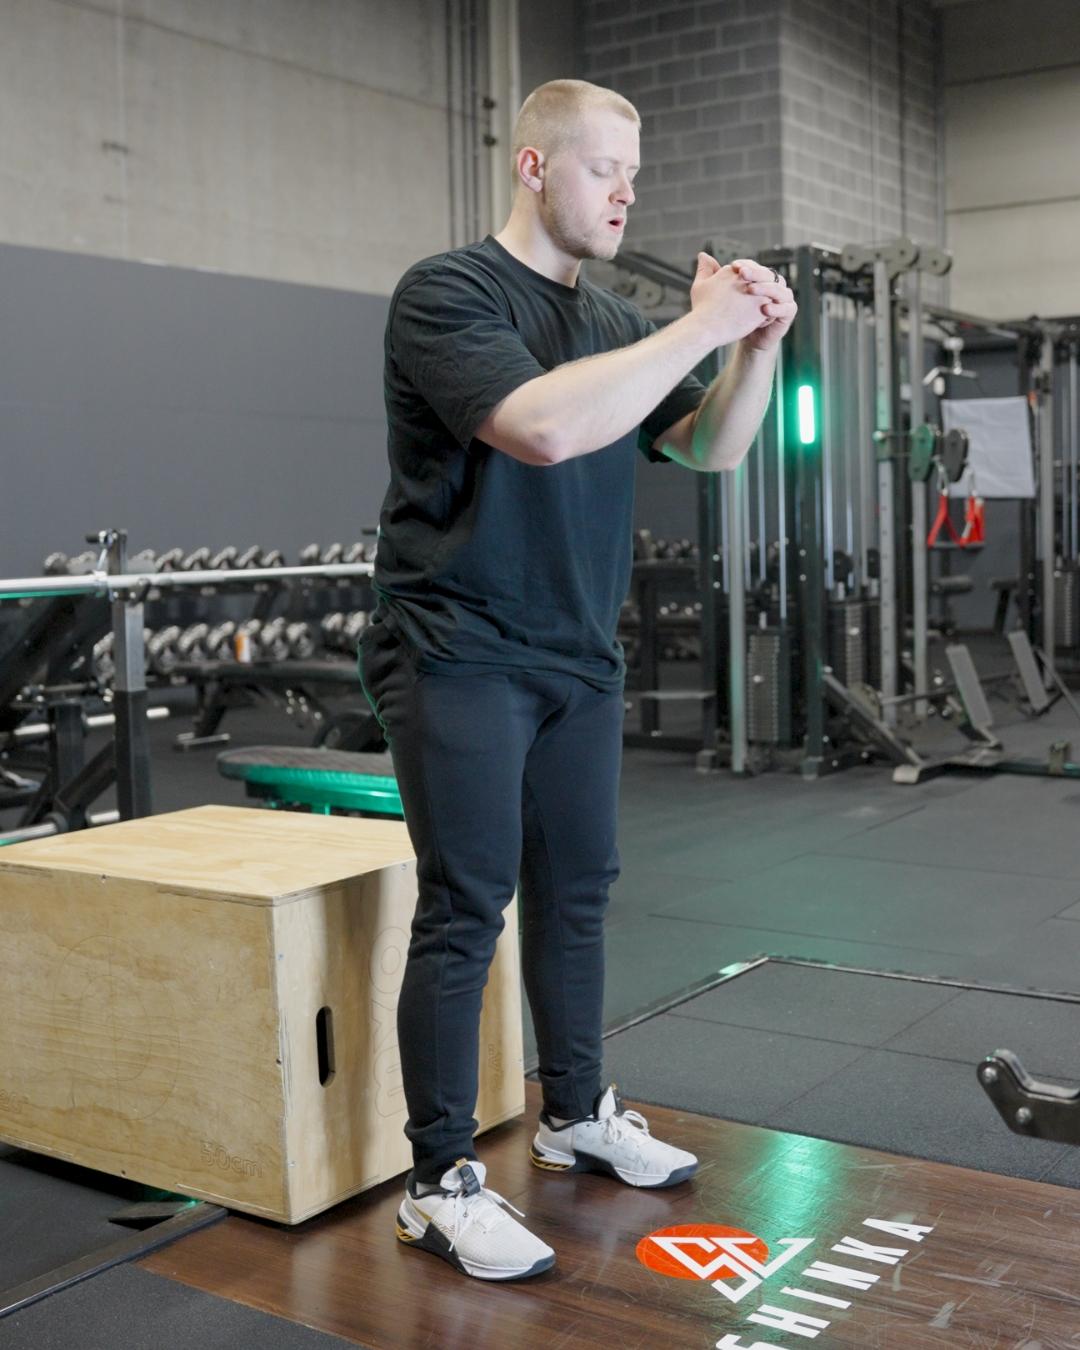
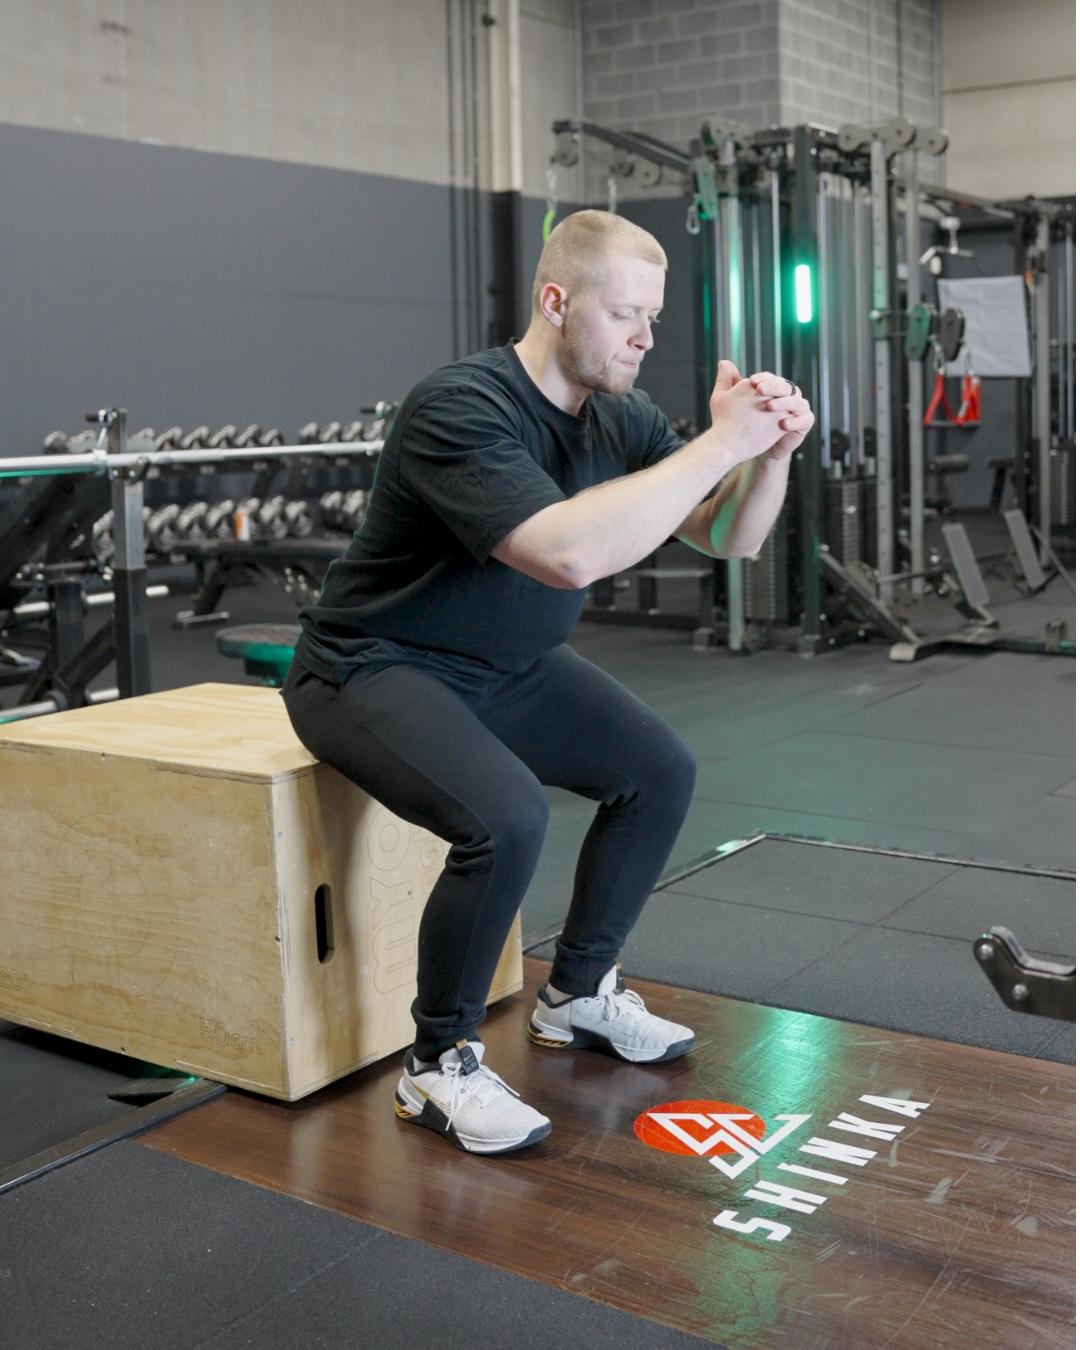
Ideal for clients who lack strength or confidence. The box serves as a depth reference and provides a sense of stability. It also allows for better control of the eccentric phase by slowing down the descent.
This variation becomes too easy rather quickly. Use it for a short phase (2–6 weeks), then move on.
2. Air Squat (bodyweight) – 2 to 6 weeks
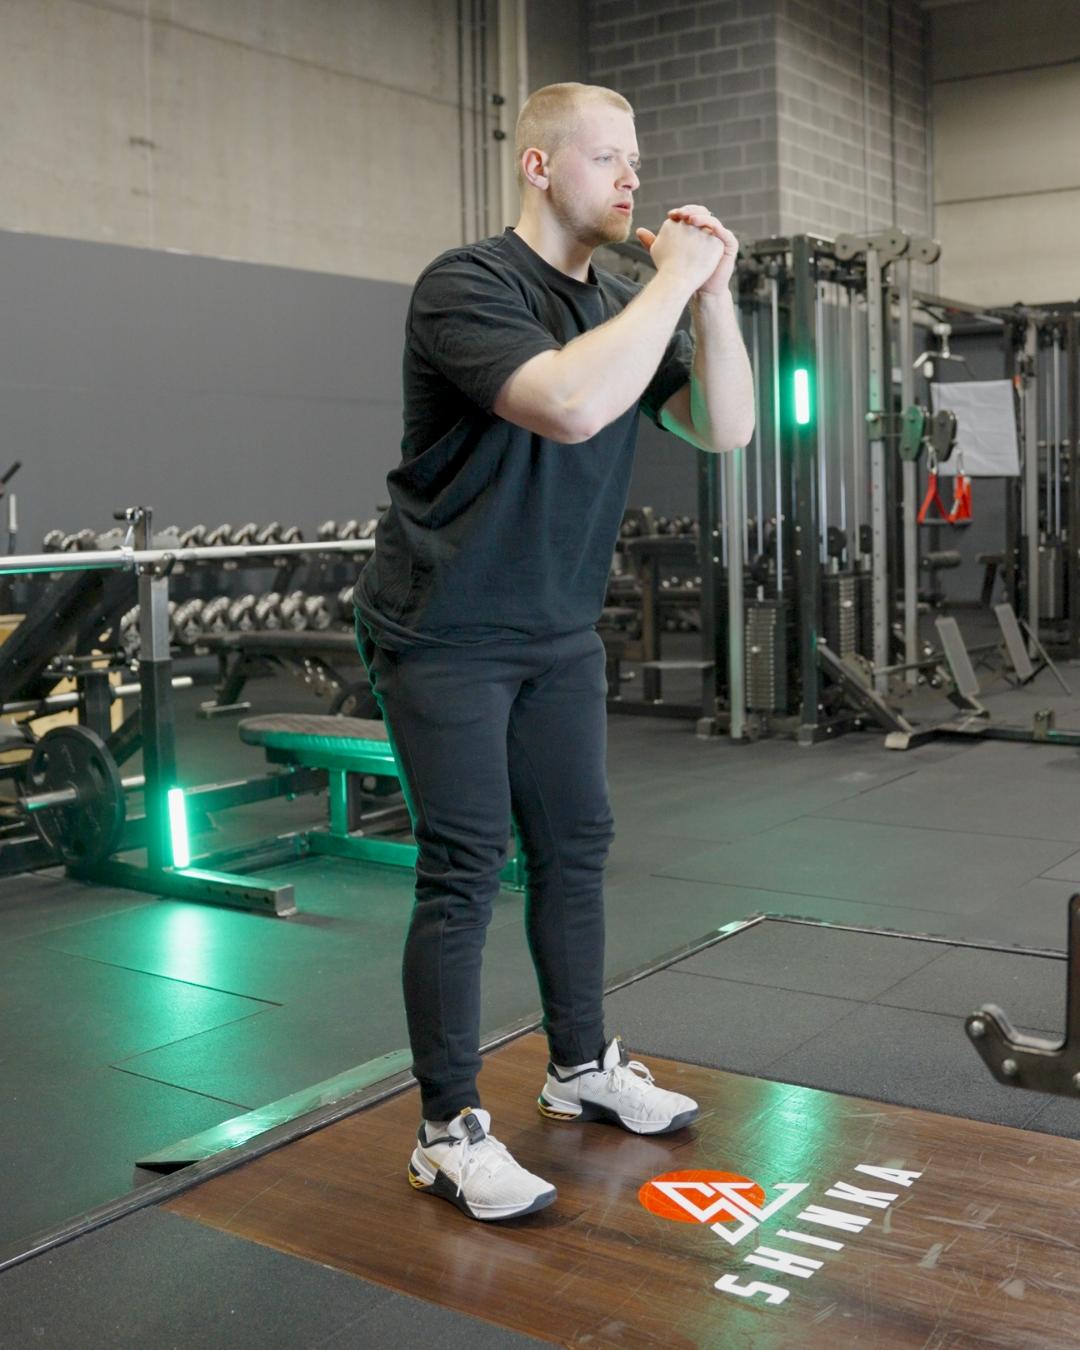
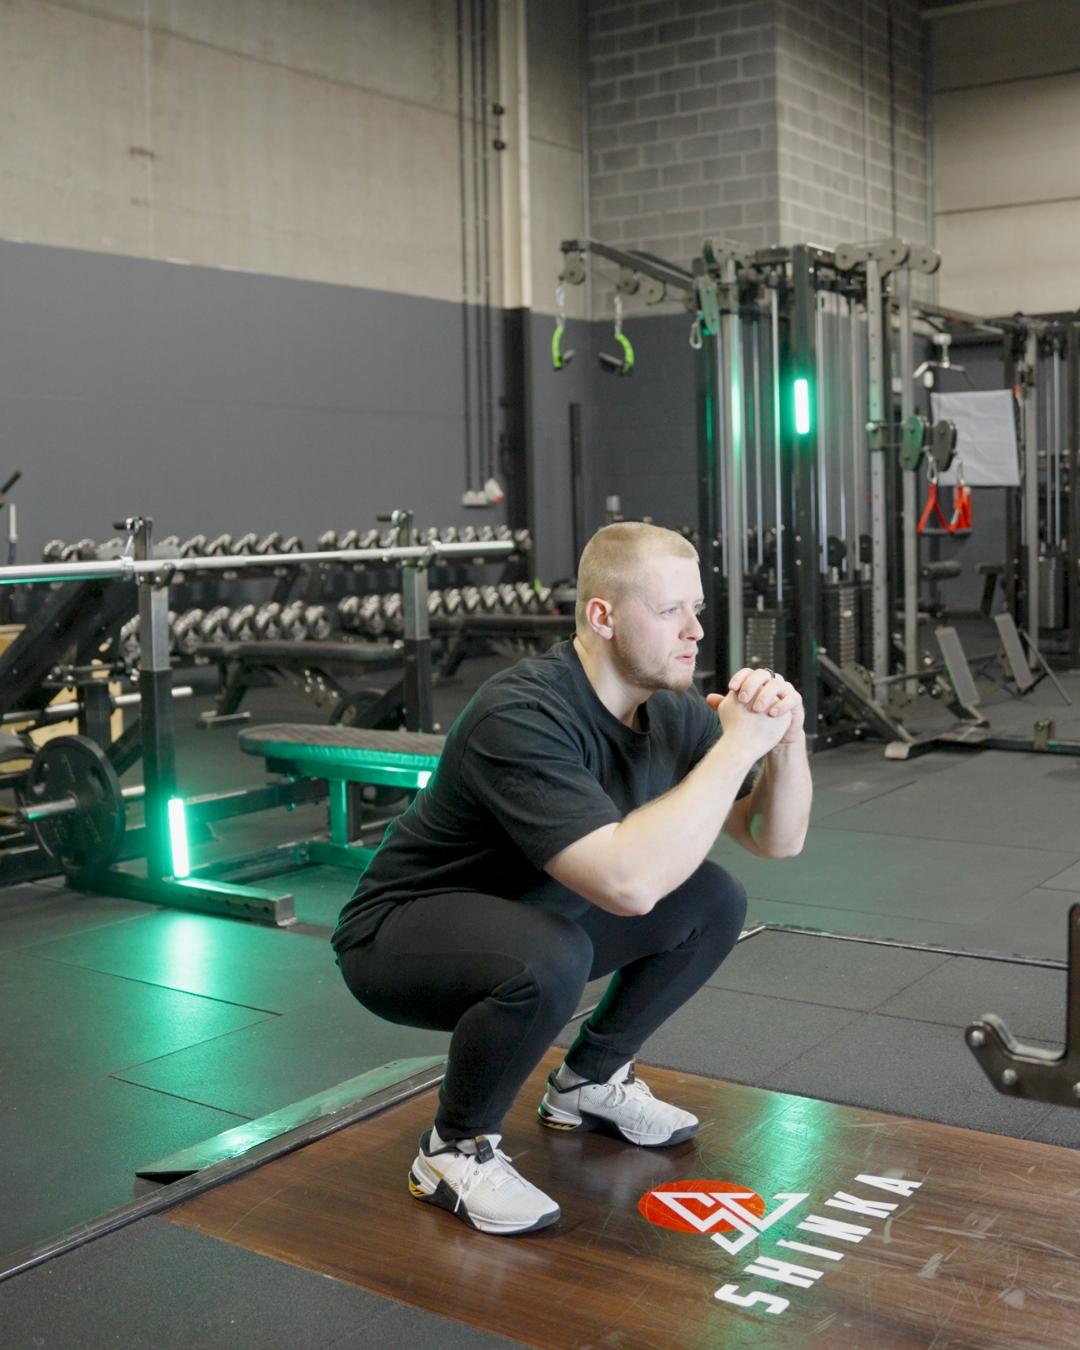
Once confidence is built with the box, progress to the free-standing bodyweight squat. Removing the box increases range of motion, immediately testing the client’s mobility.
If your client can’t maintain good form at greater depth (neutral spine, feet flat, knees tracking over ankles), don’t force it. Increase depth gradually over the weeks, and simultaneously address mobility limitations with stretching and corrective exercises.
Like the box squat, this is a basic variation. If the client has the ability and the goal requires it, move on to loaded variations sooner rather than later.
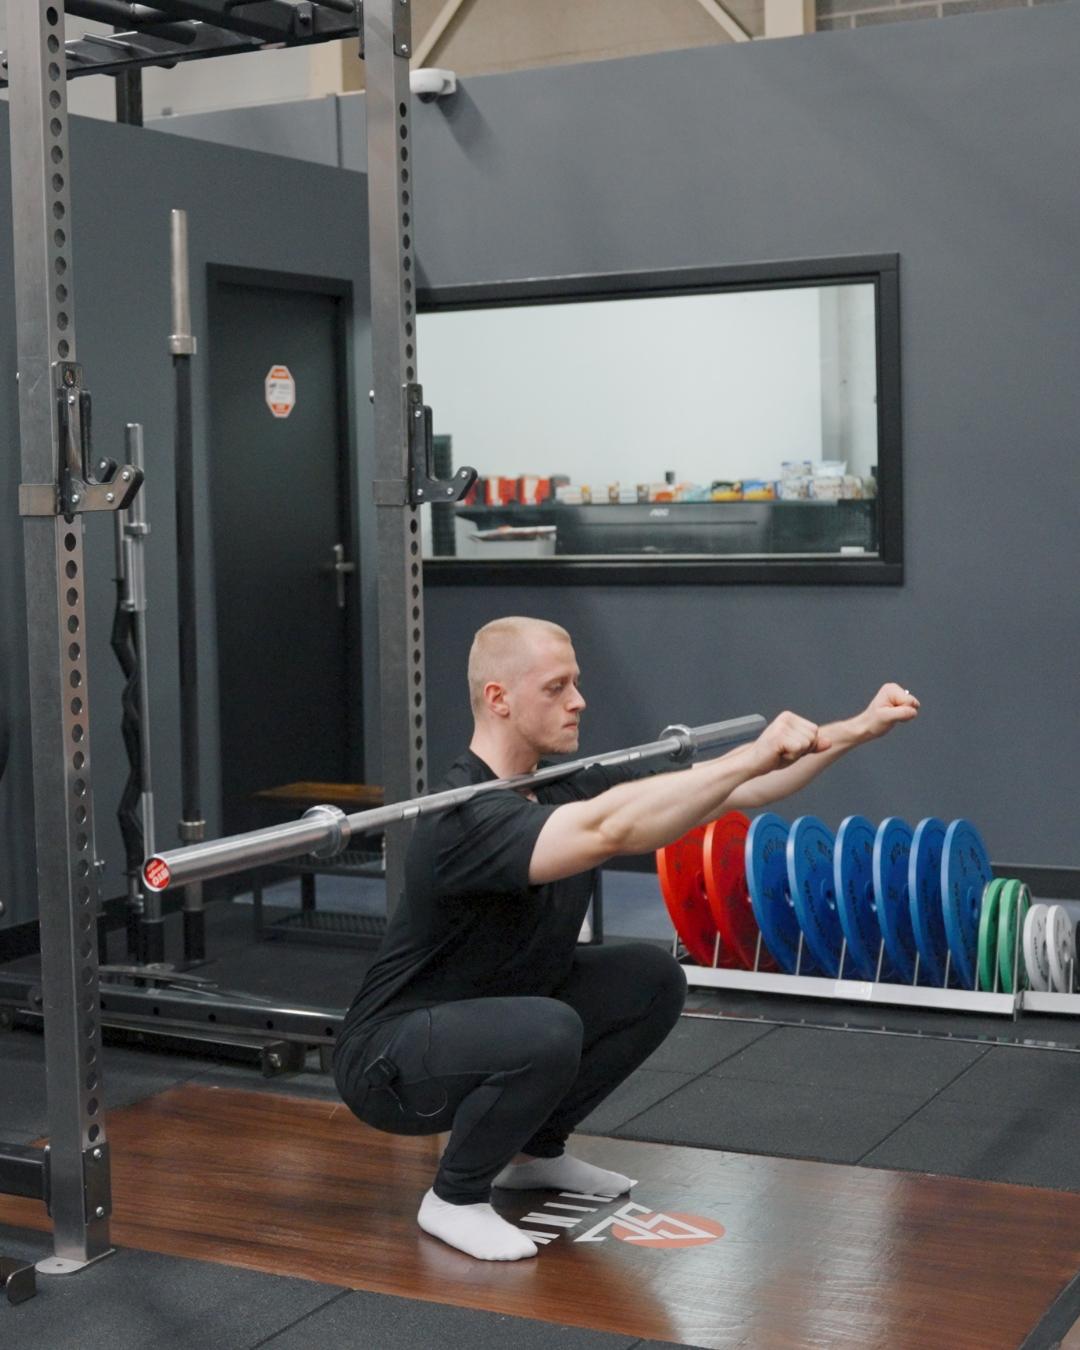
3. Landmine Squat – 2 to 12 weeks
The landmine setup promotes a more upright torso and a safer squat pattern by guiding the bar in a fixed arc. This reduces spinal stress and improves postural awareness. Since the weight is loaded in front, clients can achieve greater squat depth with better posture.
This is a great variation to use early on—especially once your client demonstrates control and starts handling load well. Transition to the next phase when appropriate.
4. Goblet Squat – 1 to 6 months
Holding a kettlebell or dumbbell at chest height helps keep the torso upright and reinforces core engagement. Unlike the landmine, this version is less guided, teaching clients how to manage instability.
It also begins to prepare the upper body to carry load—an often-overlooked requirement for barbell squats, where the load rests on the traps.
This movement can be introduced early and maintained for as long as needed. However, as the client gets stronger, the goblet position becomes limiting for heavy loads. At that point, it’s time to move to the next phase.
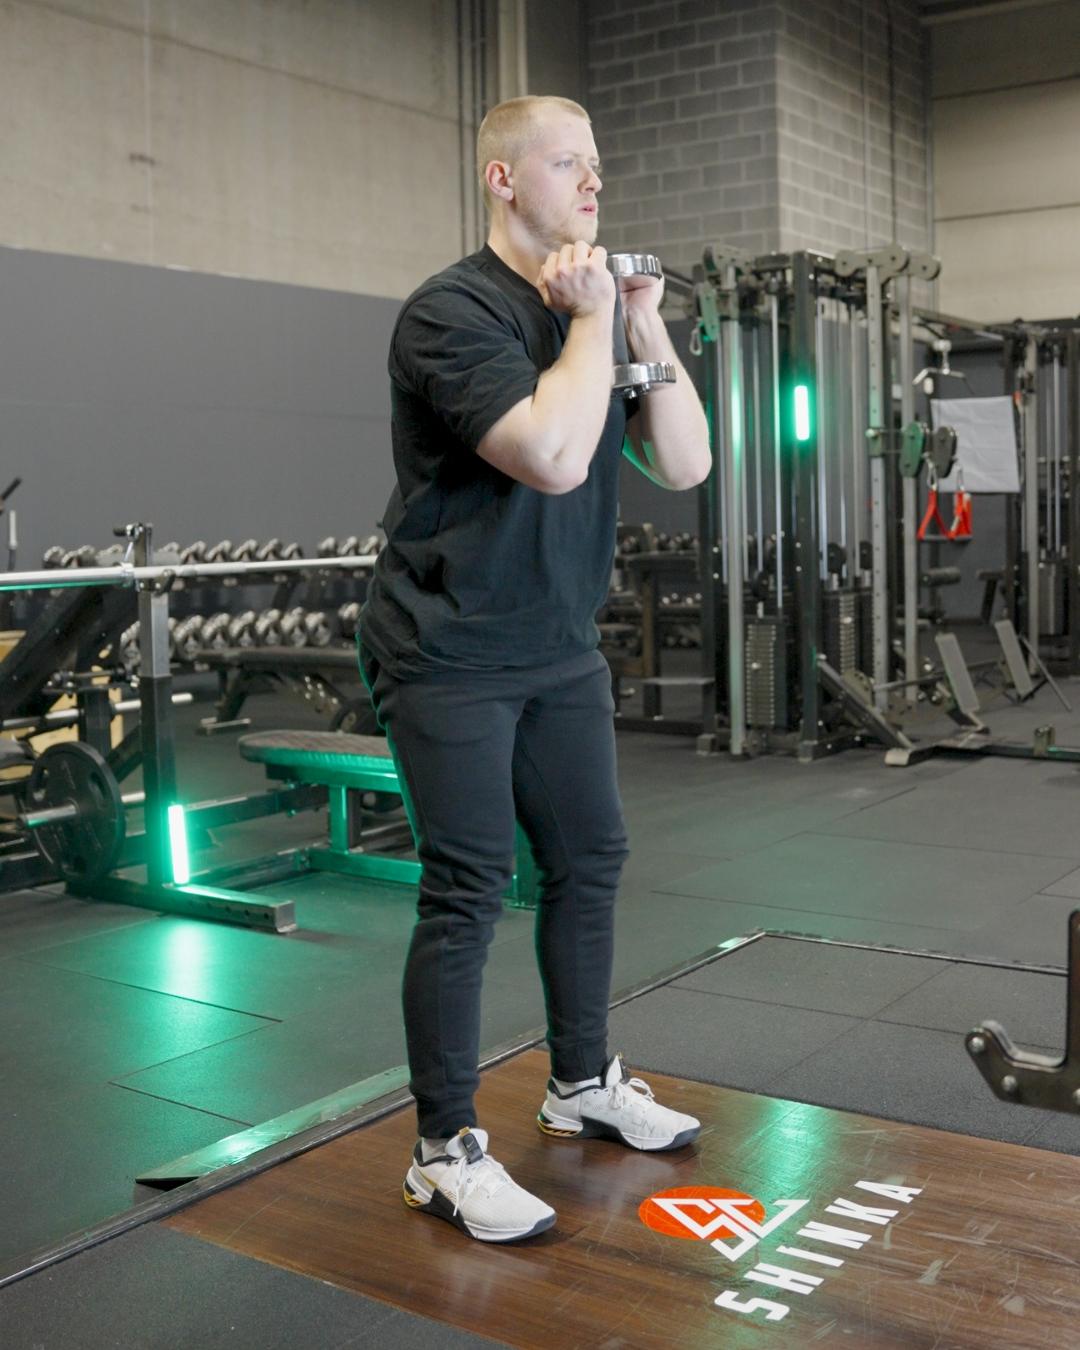
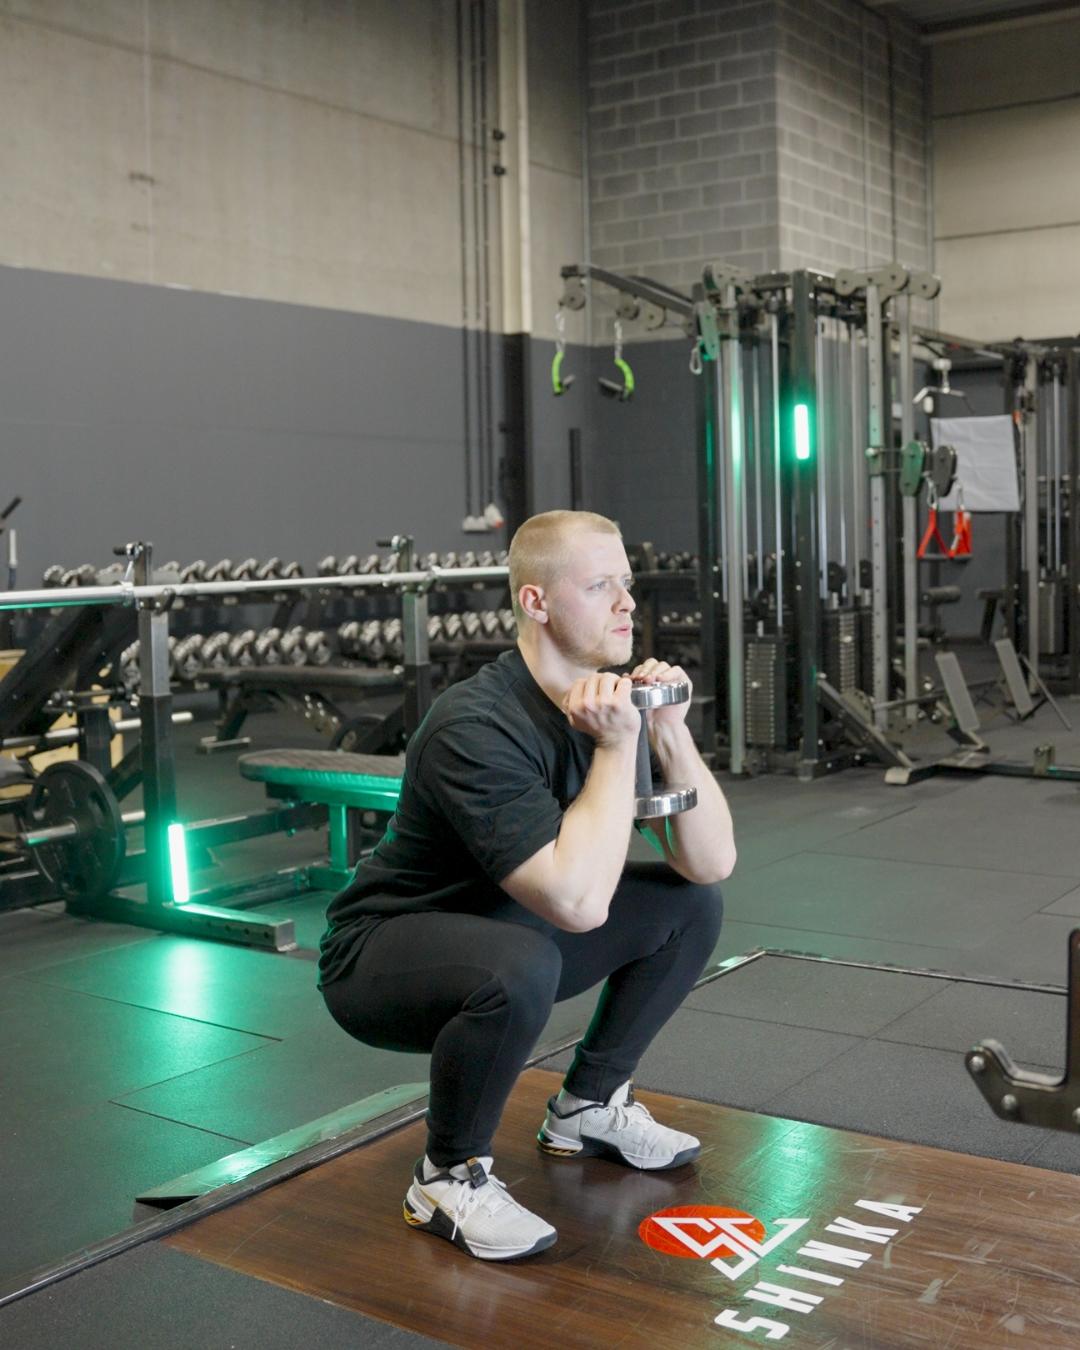
5. Dumbbell Squat – 3 to 6 months
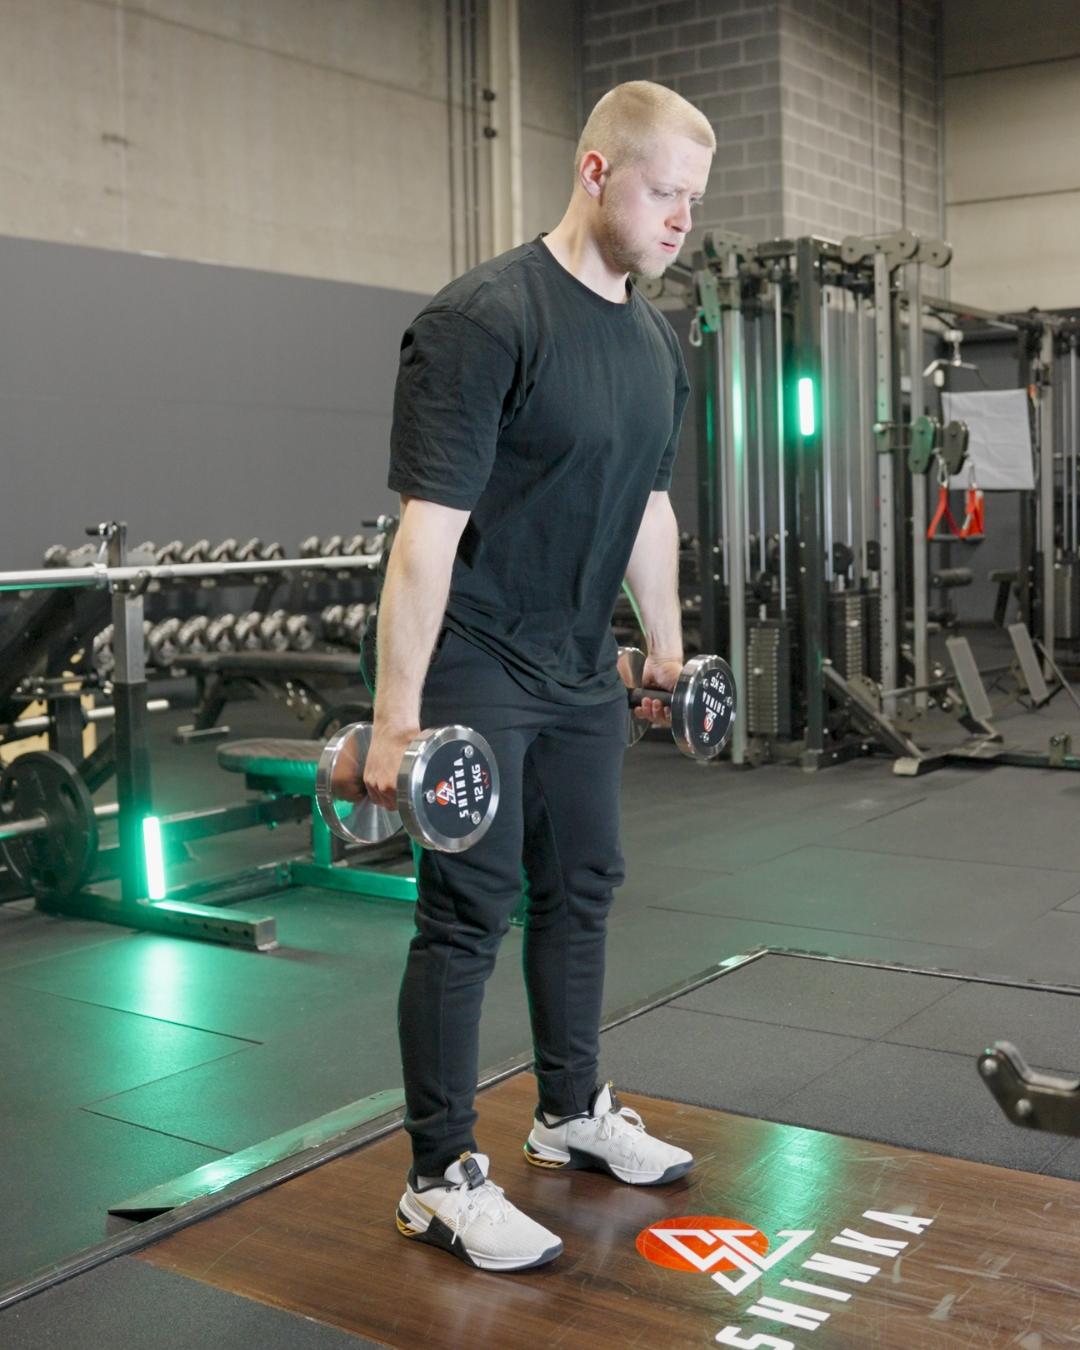
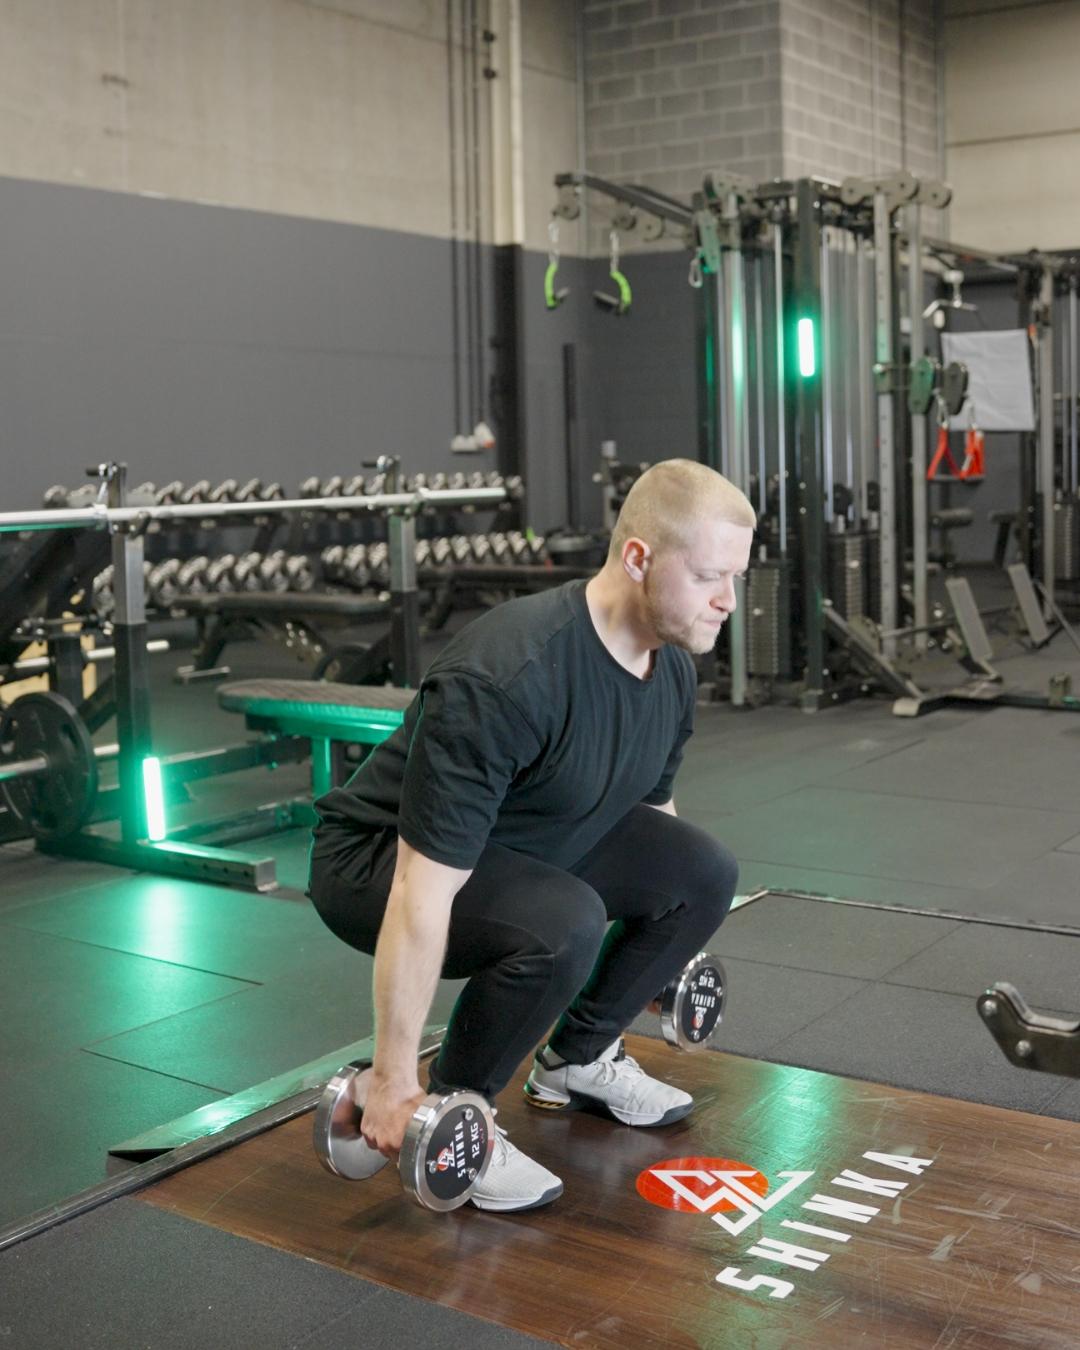
Now things get more complex: the arms hang by the sides, the center of gravity shifts, and core and coordination demands increase. This variation allows for greater total load than a goblet squat.
If your client was maxing out at 30 kg in the goblet squat, lifting 15 kg per hand in a dumbbell squat will feel more manageable and scalable.
But remember, the goal is still the barbell back squat. You won’t stay here forever—use it as a stepping stone to the Zercher Squat.
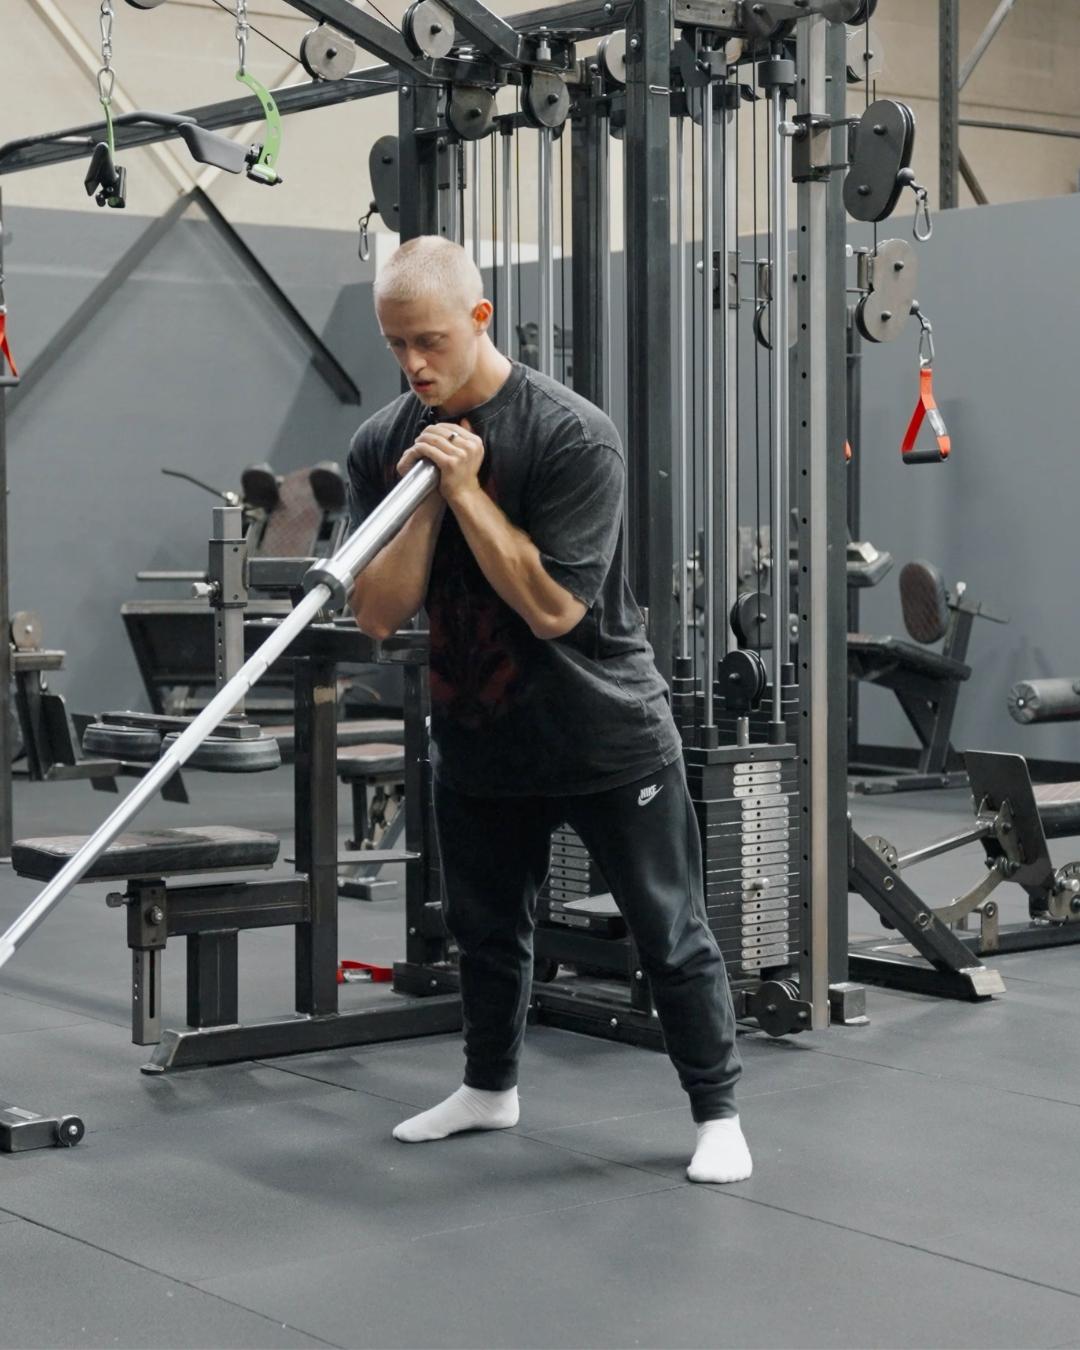
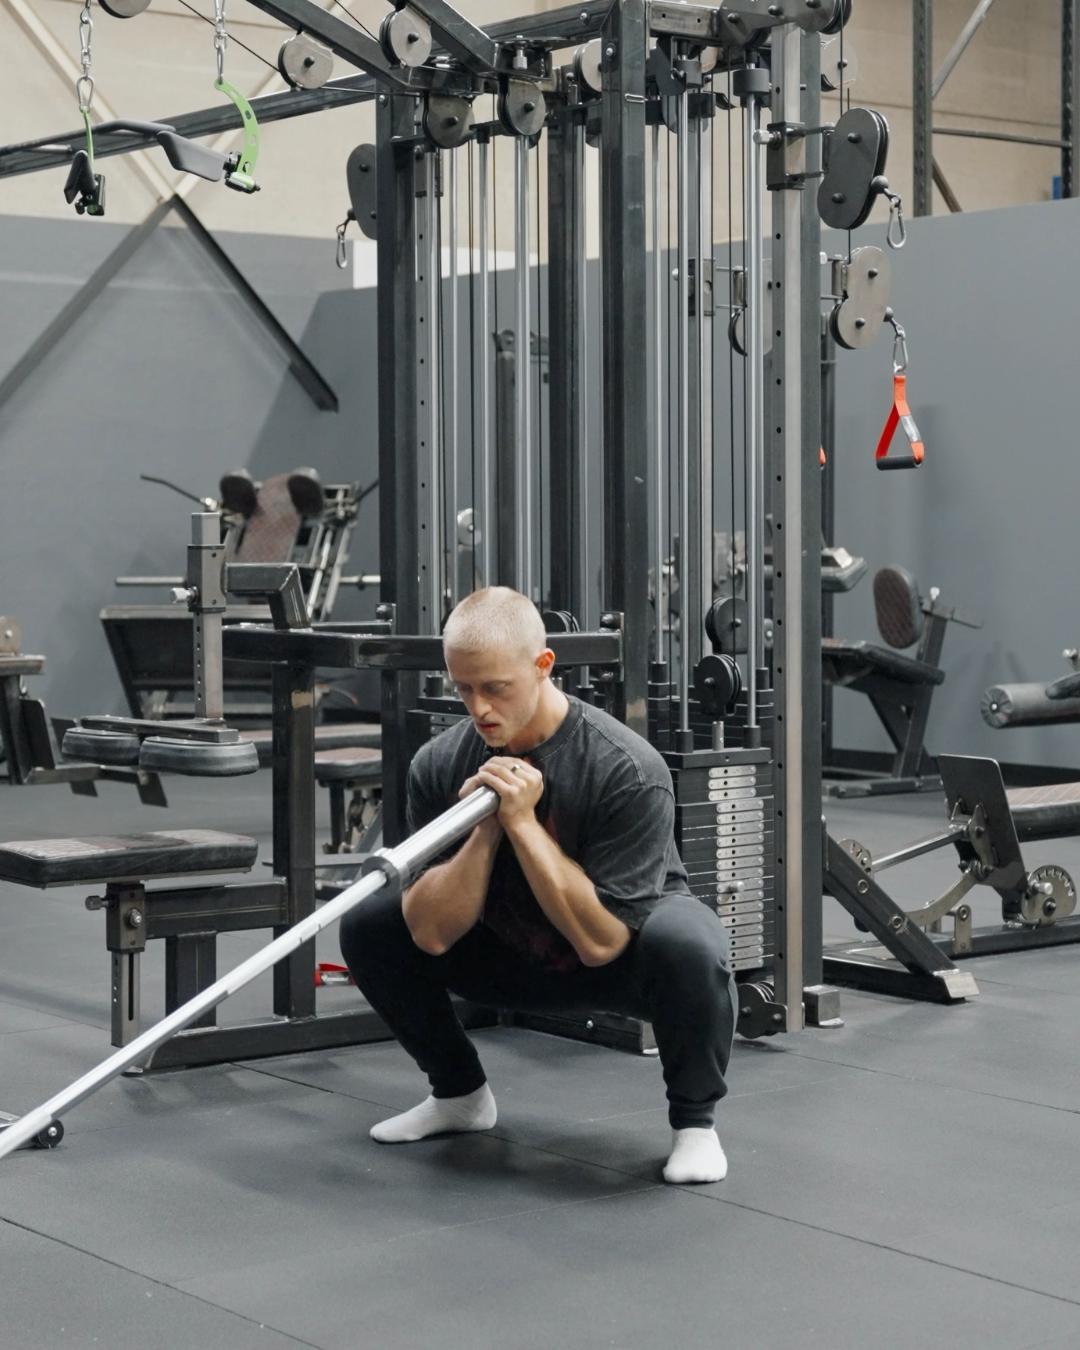
6. Zercher Squat – 4 to 12 months
A highly effective squat variation for developing the anterior chain, while maintaining a safe and strong posture. It’s less technical than the front squat, but just as powerful.
Personally, I love this movement. It allows you to lift heavy, nearly approaching back squat levels. It’s also excellent for strengthening the entire posterior chain, especially the upper back—which is crucial for comfort in the barbell back squat.
An additional benefit is that it improves breathing technique under load. The bar resting against the torso forces proper diaphragmatic breathing and breath holding during the eccentric phase.
You can start using this variation after 6 months of structured training—and keep it in your programming indefinitely. For many clients, it’s better suited to their body type and goals than the back squat itself.
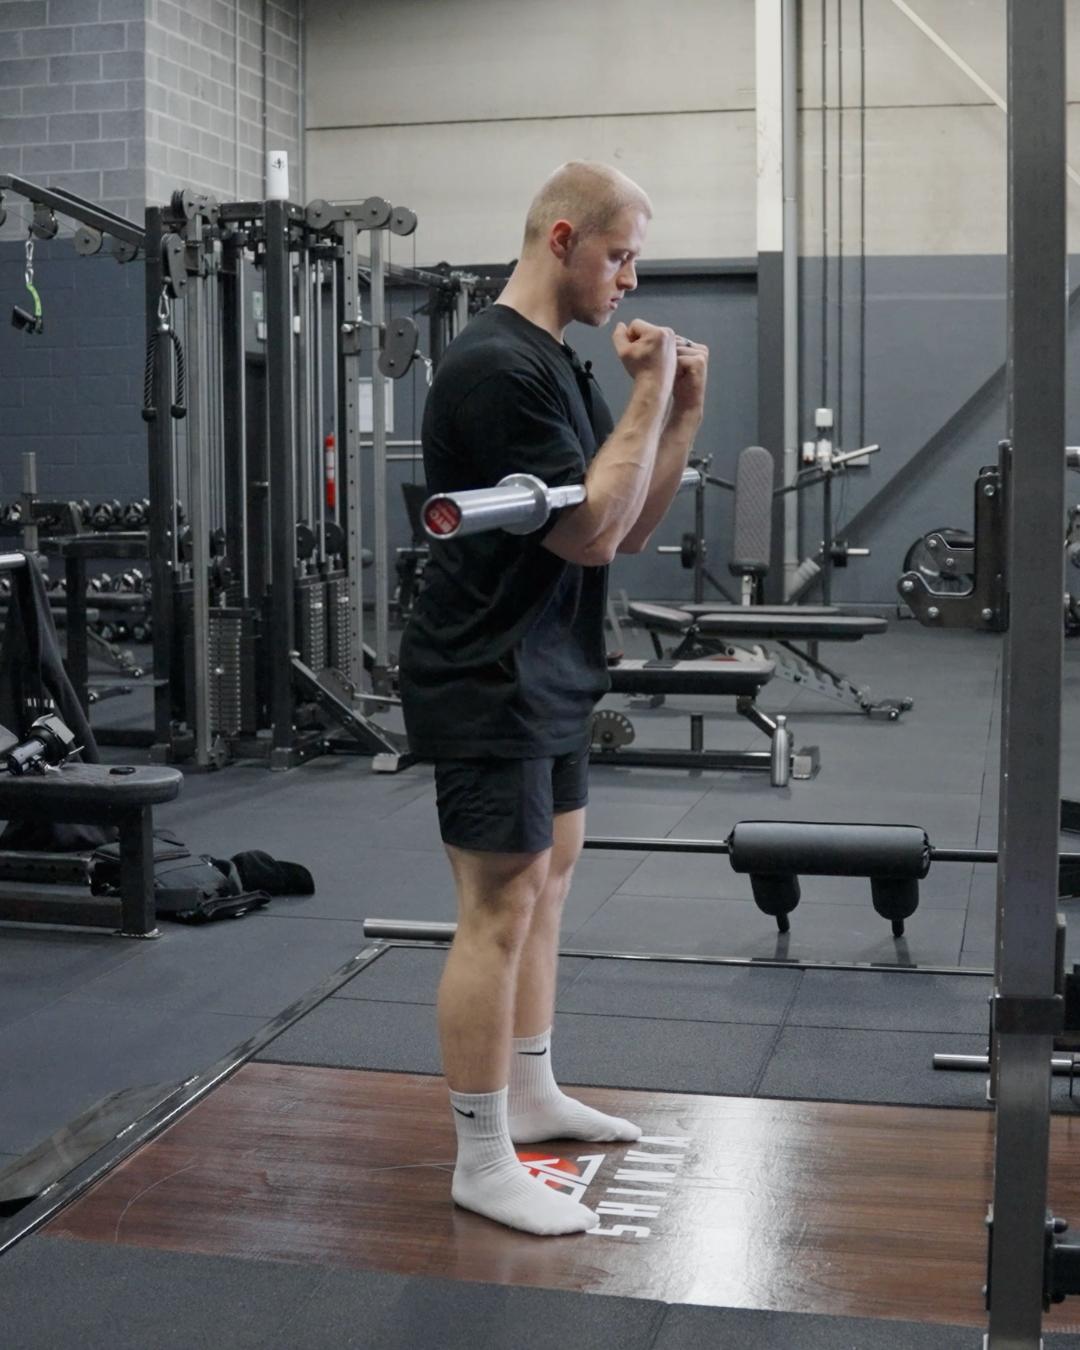
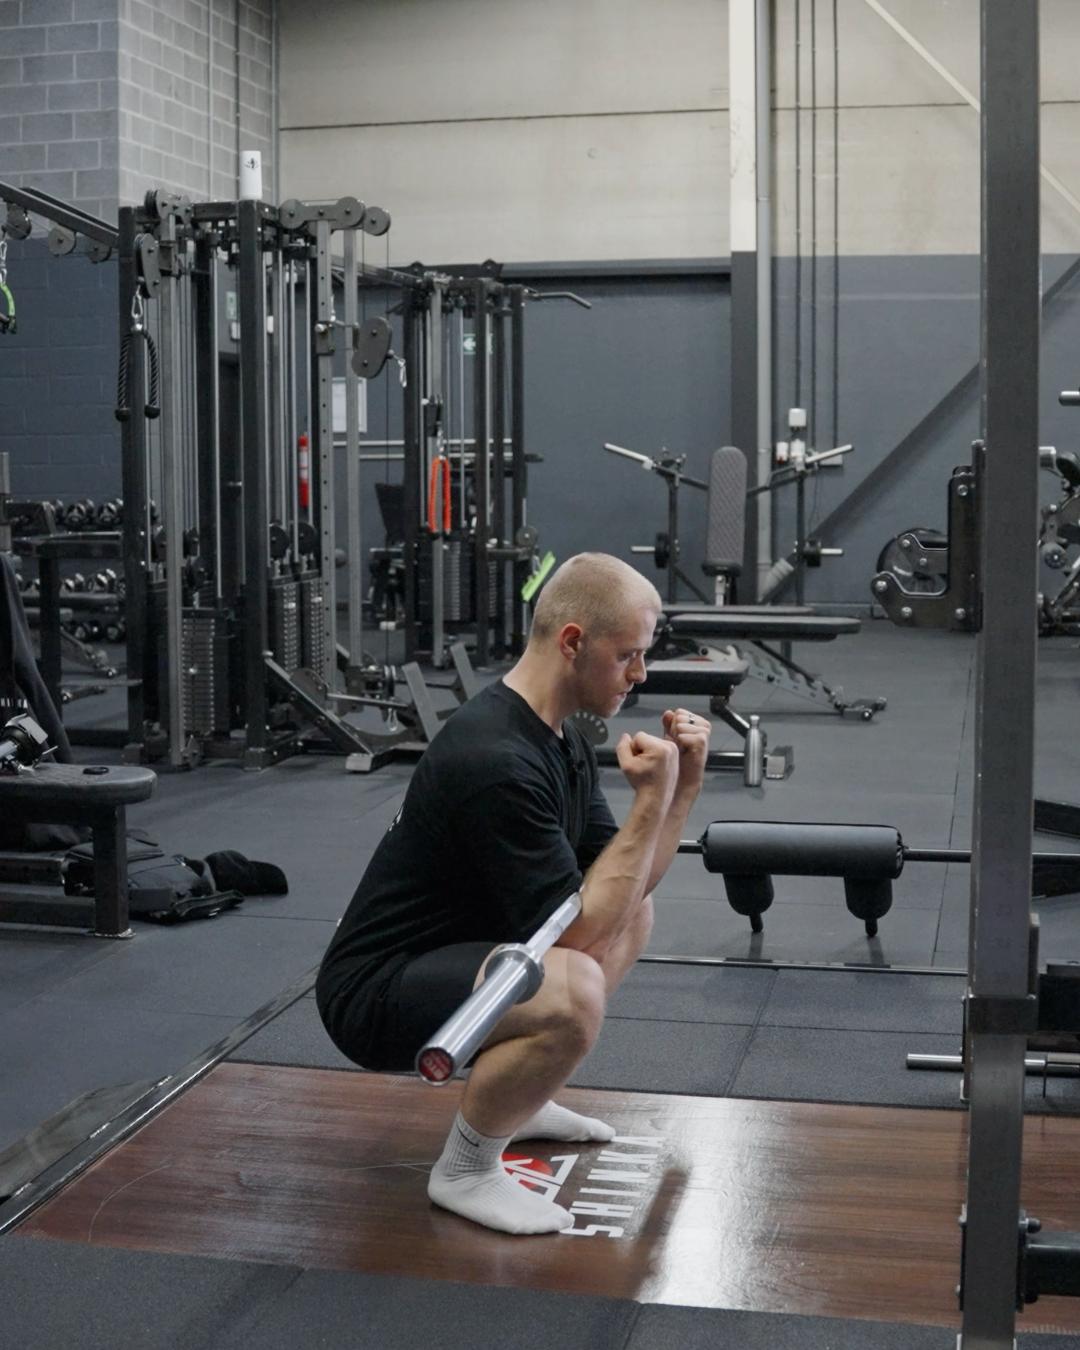
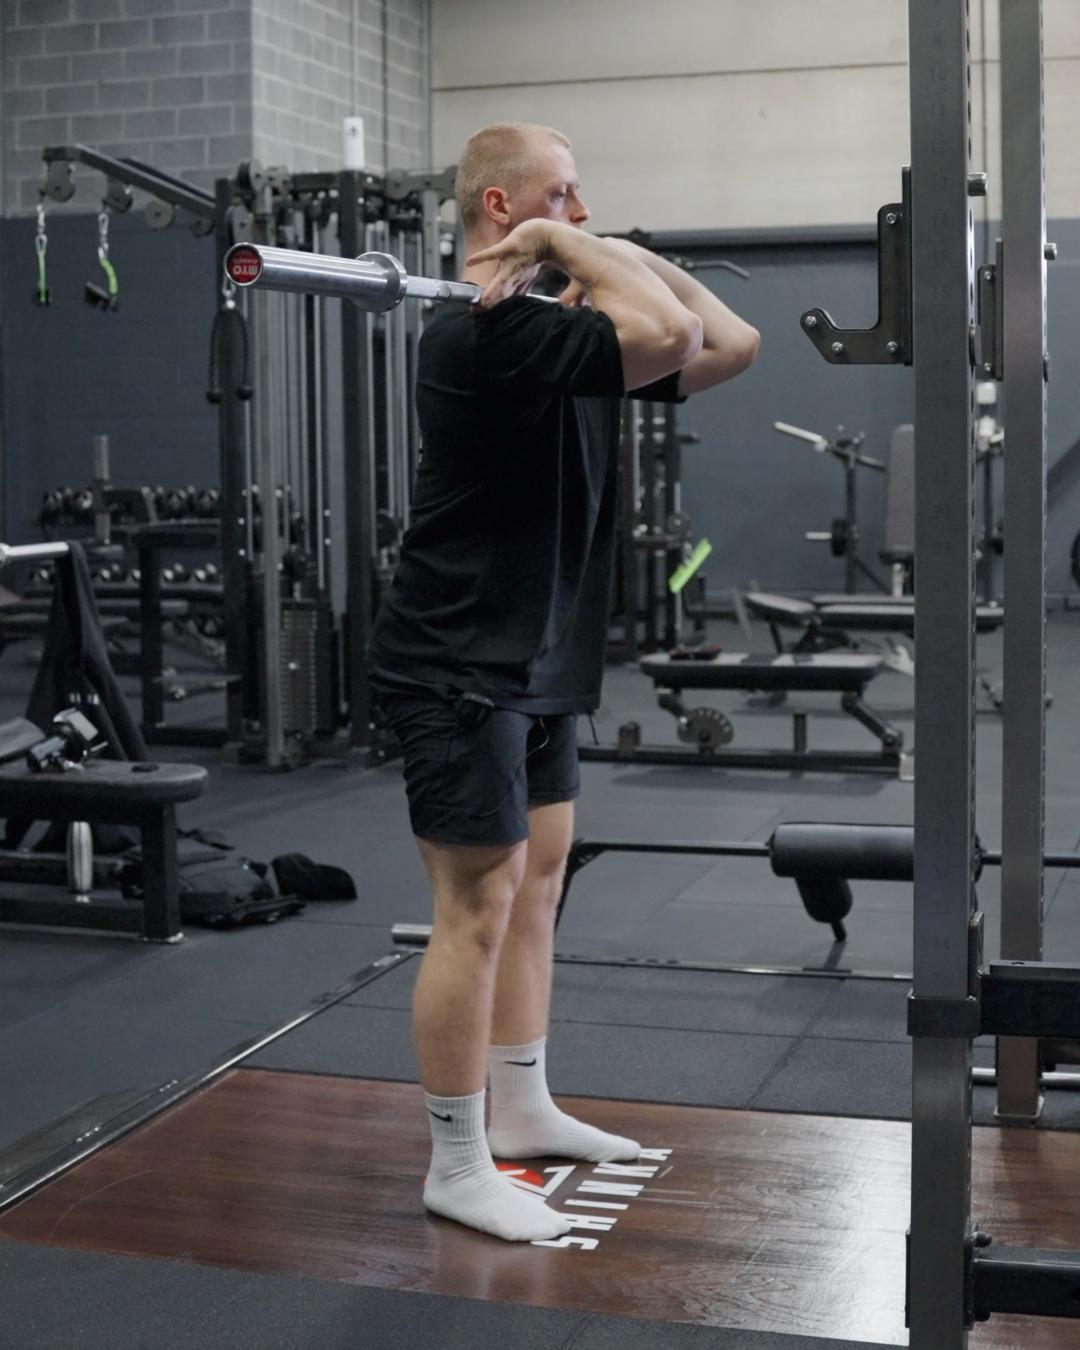
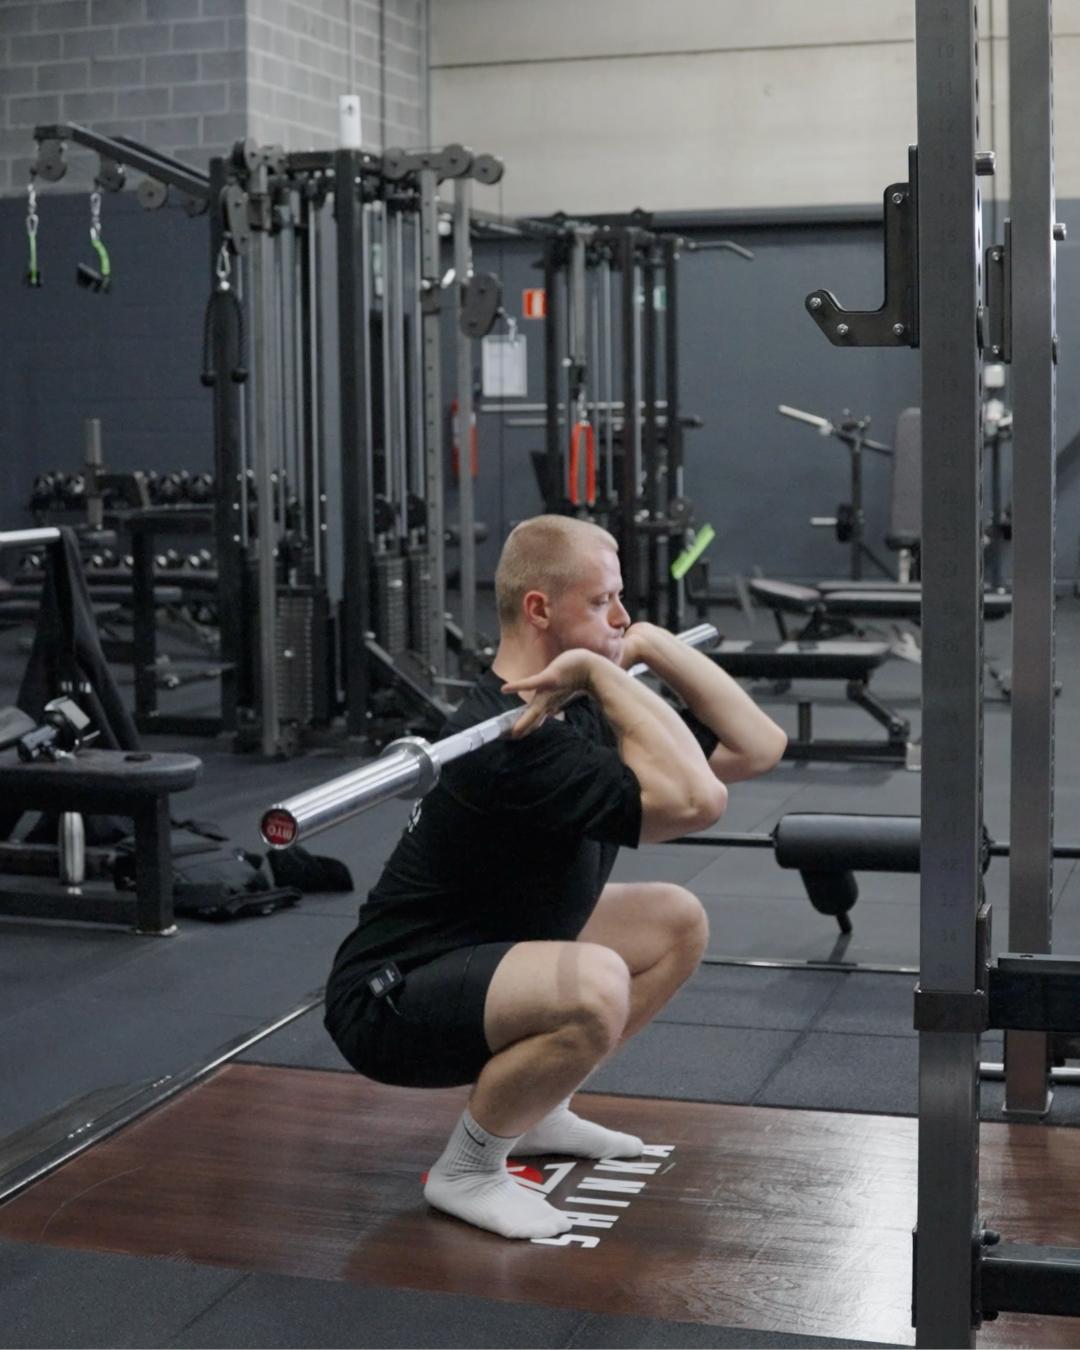
7. Frankenstein Squat & Front Squat – 6 to 12 months
(Frankenstein squat)
(Front squat)
These are more technical variations. They demand good wrist and shoulder mobility, plus a strong upright posture. They are necessary if your client’s goal is to perform the back squat at a high level.
Some argue that these are even more complex than the back squat itself, but they appear earlier in the progression because they significantly improve back squat technique—especially by strengthening the core and increasing comfortable range of motion.
The Frankenstein squat is particularly useful for teaching arm positioning before transitioning to a full front squat.
Due to the complexity of both movements, you might only keep them in your programming for 4 to 8 weeks. In fact, you can skip the front squat entirely and go straight from Frankenstein to the back squat if that fits your client’s structure and goal.
8. Back Squat – 12 months and beyond
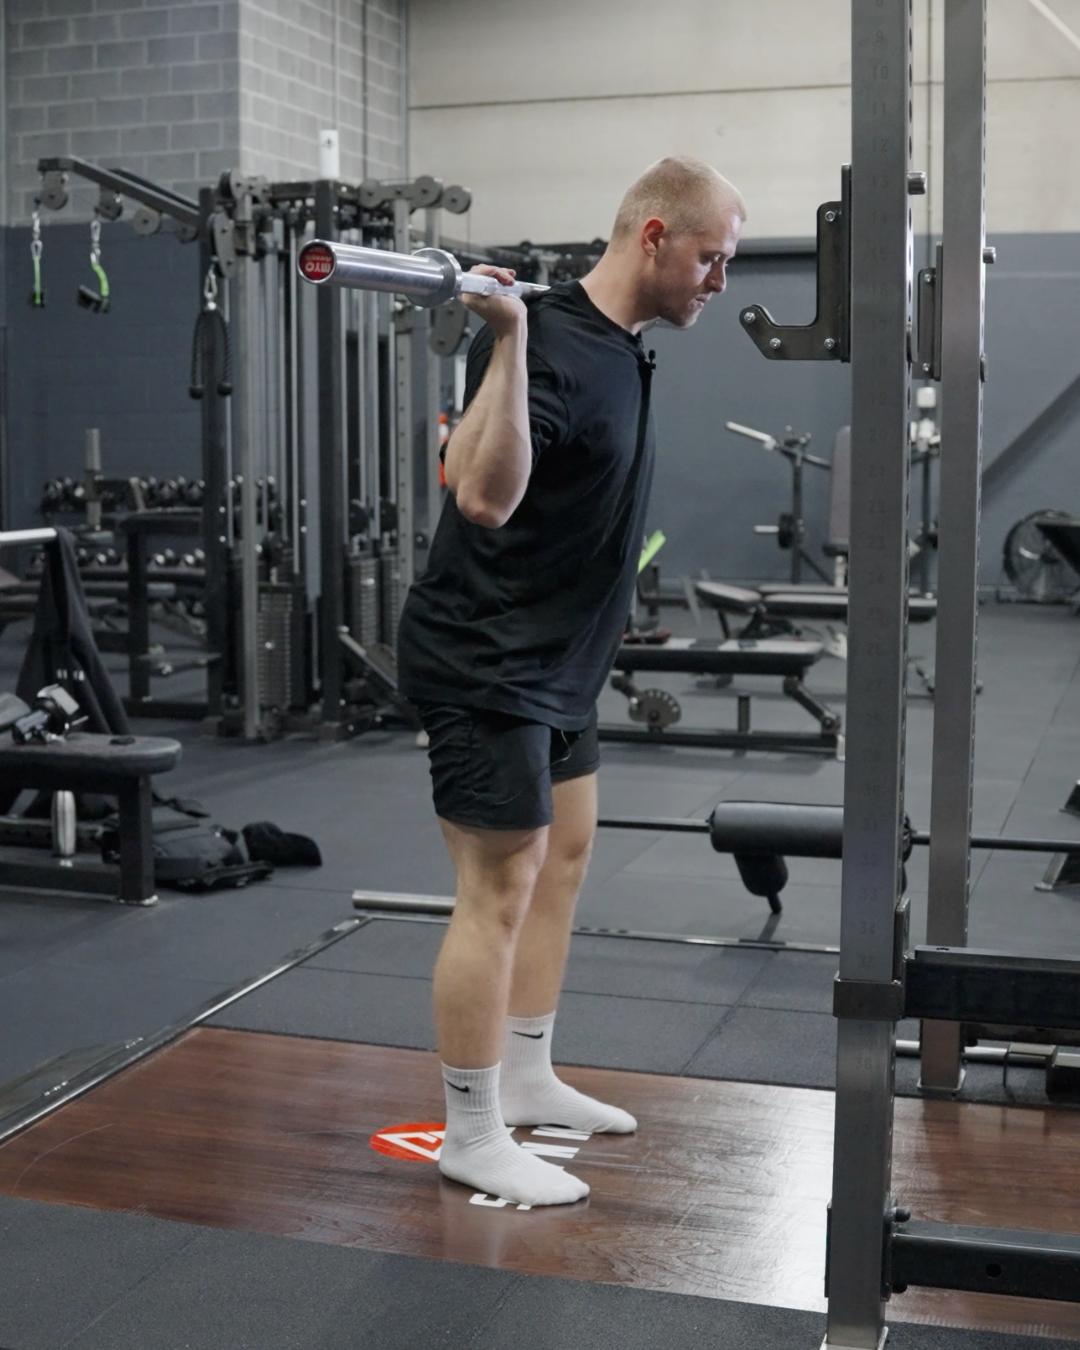
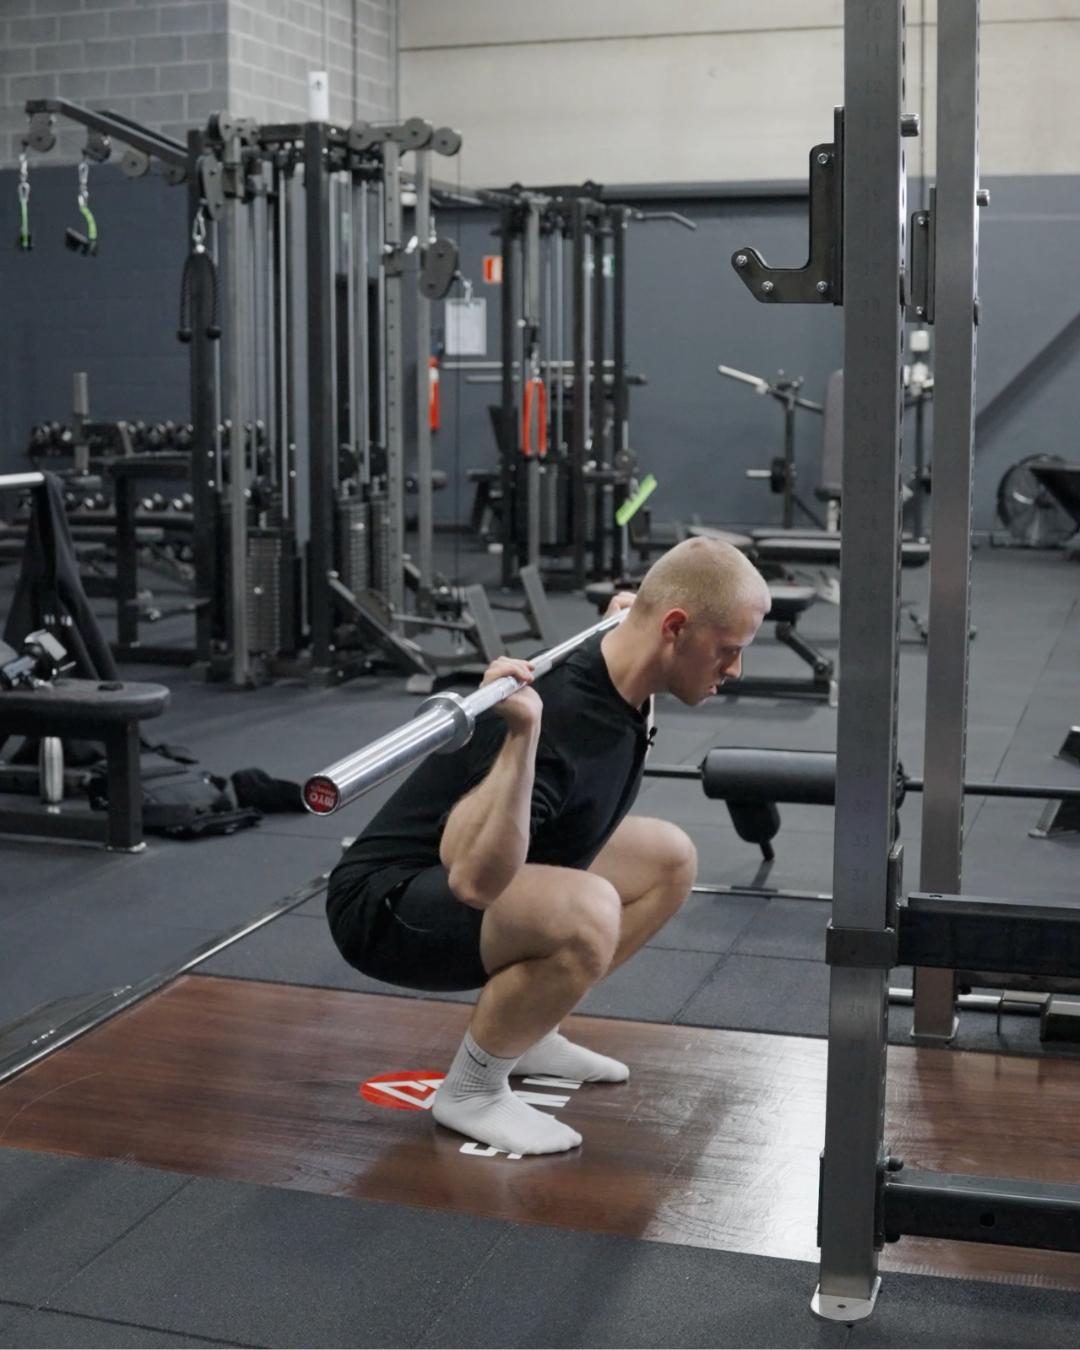
The final destination. Once all previous steps are mastered, the back squat should be safe and easy to implement. It’s a powerful compound movement for developing lower-body strength and hypertrophy.
That said, it’s not a required exercise. Some clients may never have the mobility or need to perform a barbell back squat safely. And most of them don’t need it to achieve their goals (e.g., general fitness, hypertrophy, or fat loss).
That doesn’t mean you should avoid it altogether—but you should stay flexible and assess whether the movement actually serves your client’s needs.
Addressing Mobility Limitations
As you increase difficulty to build towards the back squat, it’s critical to identify and correct any mobility limitations or muscular imbalances along the way. Two of the most common issues in beginners are:
1. Limited ankle mobility
→ This creates foot instability and alters full-body positioning. Without ankle flexion, clients struggle to push their knees forward and compensate with excessive torso lean.
2. Poor pelvic control
→ Often due to tight lower backs, hamstrings, hip flexors, and weak glutes or abdominals—commonly known as Lower Cross Syndrome.
To improve squat depth and technique, you’ll need to increase ankle and hip mobility, strengthen the core, and activate the glutes through targeted drills and exercises.
This Approach Works for All Foundational Movements
This step-by-step method doesn’t just apply to squats. It also works for deadlifts, presses, pull-ups, and other compound movements. By adjusting difficulty and load progressively, you give your client the safest and most effective path to long-term progress.
Want to go further?
We break down this method in full detail in our Program Design course. Inside, you’ll find: Concrete examples
Ready-to-use progression systems
Tailored guidance for every type of client
👉 Check out the course here … Program Design